How To Format Dash Cam? A No-Nonsense Guide
Are you a dash cam owner looking to optimize the performance of your device? Formatting your dash cam is an essential step that can greatly enhance its functionality and ensure smooth operation. In this article, we will guide you through the process of formatting your dash cam, explaining why it is important and providing you with step-by-step instructions. By the end, you’ll have all the knowledge and tools necessary to format your dashcam like a pro.
When it comes to maintaining your dash cam’s memory card, formatting plays a crucial role. Formatting erases any existing data on the card and prepares it for new recordings. This not only helps prevent errors or glitches but also maximizes storage capacity. By formatting regularly, you can improve overall system performance and avoid potential issues such as freezing or recording failures.
So, if you want to ensure that every moment captured by your dash cam is securely stored without any hiccups along the way, let’s dive into how to format dash cam.
Finding the Formatting Option on Your Dash Cam
Now, let’s dive right in and show you where to find the formatting option on your trusty dash cam!
Formatting your dash cam is important for maintaining its performance and ensuring that it continues to record smoothly.
To start, locate the settings menu on your dash cam. This can usually be found by pressing a dedicated settings button or navigating through the options using the buttons on the device.
Once you’re in the settings menu, look for an option related to storage or format. It might be labeled as ‘Format SD card’ or something similar.
Select this option and follow any prompts that appear on the screen to confirm the formatting process.
Keep in mind that formatting will erase all data on your dash cam’s memory card, so make sure to back up any important footage before proceeding.
After formatting is complete, your dash cam will be ready to use again with a clean slate and optimized performance.
Understanding the Importance of Formatting Your Memory Card
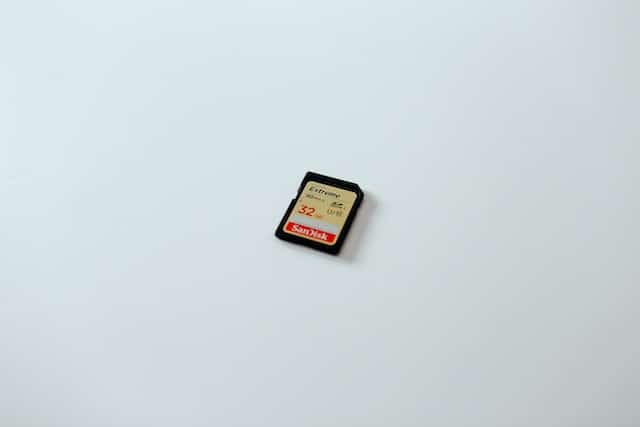
First, you need to realize just how crucial it is for you to properly clear your memory card. When using a dash cam, formatting the memory card is essential for maintaining optimal performance and ensuring reliable recording. Formatting erases all the data on the card and prepares it for new recordings, preventing any potential errors or corruptions that may occur over time.
By formatting regularly, you can prevent issues such as freezing or crashing of your dash cam, which could result in loss of important footage during critical moments. Moreover, formatting helps to extend the lifespan of your memory card by eliminating unnecessary files and reducing wear and tear on the storage medium.
So, make sure to take a few minutes every now and then to format your memory card properly – it’s a small task that goes a long way in ensuring smooth operation and preserving valuable recordings on your dash cam.
Step-by-Step Guide to Formatting Your Dash Cam
To properly clear your memory card, it’s time to walk through the step-by-step process of giving your dash cam a fresh start. First, make sure your dash cam is turned off and remove the memory card from its slot.
Take note of any important footage or files you want to save before formatting.
Next, insert the memory card into a computer or laptop using an SD card reader. Open File Explorer (Windows) or Finder (Mac) and locate the removable disk corresponding to your memory card.
Right-click on the disk and select ‘Format’ from the options menu. Choose the file system format as FAT32 for compatibility with most dash cams and click ‘Start’ to begin formatting.
Keep in mind that this process will erase all data on the memory card, so double-check that you have saved any important files elsewhere before proceeding.
Once formatting is complete, safely eject the memory card from your computer and reinsert it into your dash cam.
Your dash cam is now ready for use with a clean slate!
Read: How To Reset Dash Cam? No-Nonsense Guide for 2023
Best Practices for Dash Cam Formatting
Make sure you follow these best practices to ensure your memory card is optimized and ready for use in your vehicle’s camera.
First, always format your dash cam’s memory card using the device itself rather than a computer or other external device. This ensures compatibility and reduces the risk of data corruption.
Additionally, it’s recommended to format the memory card regularly, preferably once a month or whenever you notice any performance issues. This helps maintain optimal functionality and prevents potential errors or crashes.
Another important practice is to avoid interrupting the formatting process once it’s started. Abruptly removing the power source or turning off the device during formatting can lead to file system errors on the memory card.
Lastly, consider using high-quality memory cards with sufficient storage capacity for your dash cam recordings. High-speed Class 10 microSD cards are generally recommended as they provide faster write speeds and better reliability for capturing high-resolution videos.
Read: What Size SD Card For Dash Cam Should You Choose?
By following these best practices, you can ensure that your dash cam operates smoothly and records footage effectively while out on the road, ultimately providing you with clear and reliable evidence in case of any accidents or incidents.
Troubleshooting Common Formatting Issues
If you’re experiencing difficulties with your memory card, try ensuring that it’s free from any dust or debris. Sometimes, formatting issues can arise due to a dirty or damaged memory card.
To clean it, gently wipe the contacts with a soft cloth or use compressed air to remove any particles. Additionally, make sure that your dash cam is powered off before removing or inserting the memory card to avoid any potential data corruption.
If these steps don’t resolve the issue, you can also try formatting the memory card using your computer instead of the dash cam itself. Connect the memory card to your computer using a card reader and locate it in File Explorer (Windows) or Finder (Mac).
Right-click on the memory card and select ‘Format’ to initiate the formatting process. However, keep in mind that formatting will erase all data on the memory card, so make sure to back up any important files before proceeding.
By following these troubleshooting steps, you should be able to resolve common formatting issues with your dash cam and ensure its optimal performance.
Conclusion: How to Format Dash Cam
In conclusion, formatting your dash cam is a crucial step to ensure its optimal performance and the longevity of your memory card. By following the step-by-step guide provided in this article, you can easily format your dash cam and avoid potential issues caused by corrupted files or insufficient storage space. Remember to always back up any important footage before formatting and consider using a high-quality memory card for better reliability.
Additionally, it’s essential to be aware of common formatting issues that may arise, such as error messages or compatibility problems. Troubleshooting these issues can often be resolved by checking for firmware updates or seeking assistance from the manufacturer’s customer support.
By adhering to best practices, such as regularly formatting your dash cam and keeping your device up-to-date, you can ensure a seamless recording experience while enjoying peace of mind on the road.


